METADATA IMPORT
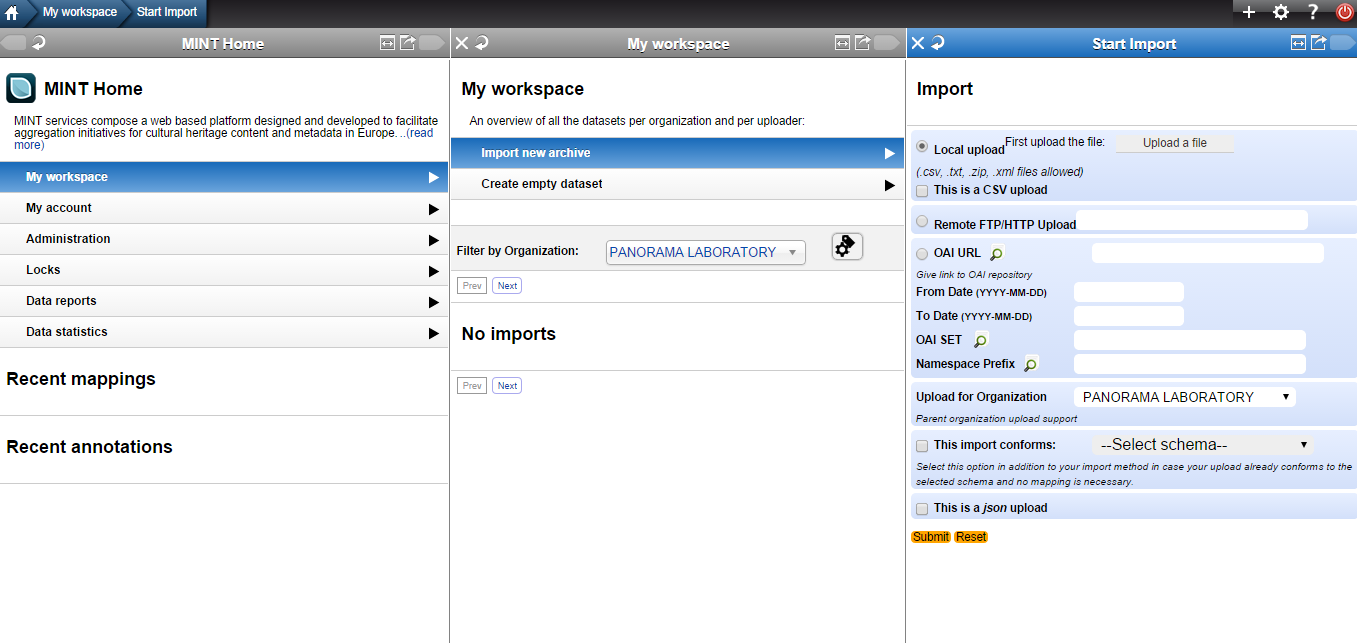
To import your metadata to the MINT mapping tool, you have to log in and select “My Workspace” from the MINT Home pane. Note that your role must have been assigned to “Annotator” or “Annotator & Publisher” or “Administrator” otherwise this option will not appear.
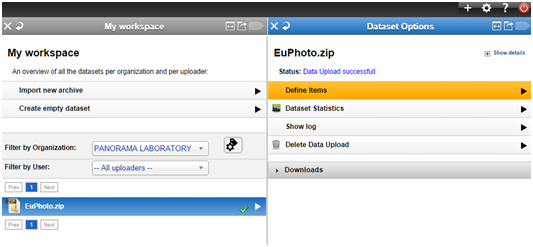
⇒ Select “My workspace” menu from MINT start page, “Import new archive” to import your metadata. Note that if you have access to more than one organizations, you need to specify for which organization you are performing the upload by selecting it from the drop-down list.
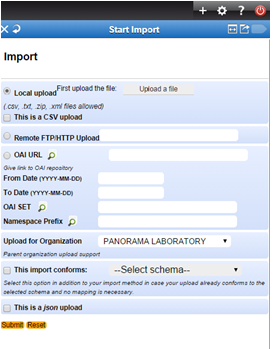
⇒ Click on “Upload file” ![]()
Different upload protocols are supported:
HTTP Upload
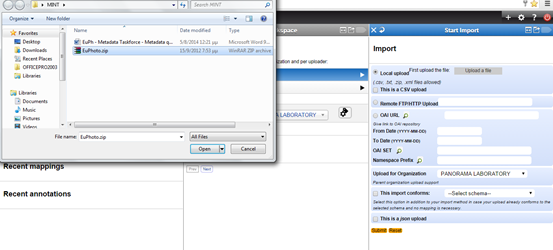
Click “Upload a file” button and select the file containing your data. You can upload XML, CSV files or zip files containing XML files. Note that if you upload a CSV file, you have to tick on “This is a CSV upload” checkbox and specify the delimiter as shown in the figure below. It is also important to note at this point that only UTF-8 encoding is supported.

IMPORTANT NOTE: Every import that has at least one file is considered as a new upload of metadata and handled in the same way as if it had more than one. For this reason, it is recommended to use zip archives with many XML or CSV files compressed and limit the ingestion of single XML or CSV files only for testing purposes.
Remote FTP/HTTP Upload
You can upload a file from a remote FTP/HTTP location. Useful when your files are available already on a remote server.
OAI URL
The MINT ingestion tool has an integrated OAI-PMH V2 harvester, which can be used to access data stored in a remote server that supports this protocol. You have to fill in the base URL of the OAI-PMH repository and then click on the ![]() button next to it in order to check its validity. You can also fetch data based on a specific date interval as it is defined by the OAI-PMH protocol. Finally, you can fetch the OAI-PMH sets and namespaces that the remote repository supports and choose from them the set and type of metadata you wish to import.
button next to it in order to check its validity. You can also fetch data based on a specific date interval as it is defined by the OAI-PMH protocol. Finally, you can fetch the OAI-PMH sets and namespaces that the remote repository supports and choose from them the set and type of metadata you wish to import.
⇒ Import the file containing your data either via local upload or via Remote FTP/ΗTTP, OAI URL upload and click “submit”
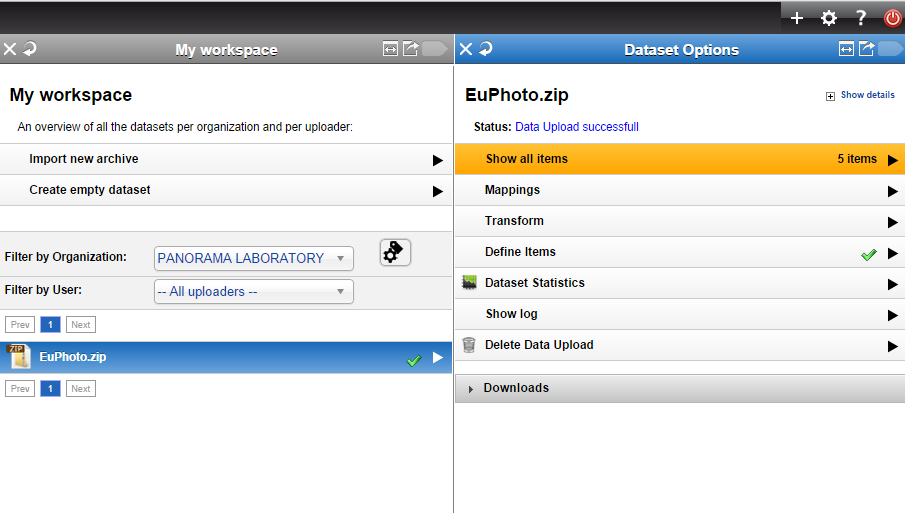
⇒ By selecting the uploaded file from “My workspace” you can view the “Dataset Options”
⇒ After importing a file to MINT Ingestion platform it can be viewed in “My Workspace menu” either with a green ![]() tick which indicates that the import was successful or with a red
tick which indicates that the import was successful or with a red ![]() which indicates that there is a problem during the upload
which indicates that there is a problem during the upload
Wrong import: By selecting an unsuccessful import you can get feedback on the error occurred by clicking on the “Show Log”
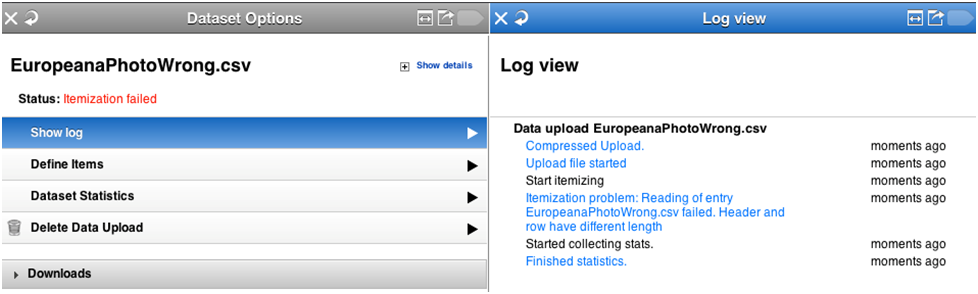
The ‘Define Items’ and ‘Dataset Statistics’ options appear but they don’t work because the import was not successful and the user who encounters this situation is suggested to click on “Delete Data Upload” to delete the Upload.
VIDEO for Import dataset
Define items
By clicking on ‘Define Items’ the user can set:
- the item level of your import (root item)
- The item label of your import (title)
- The identifier of your import
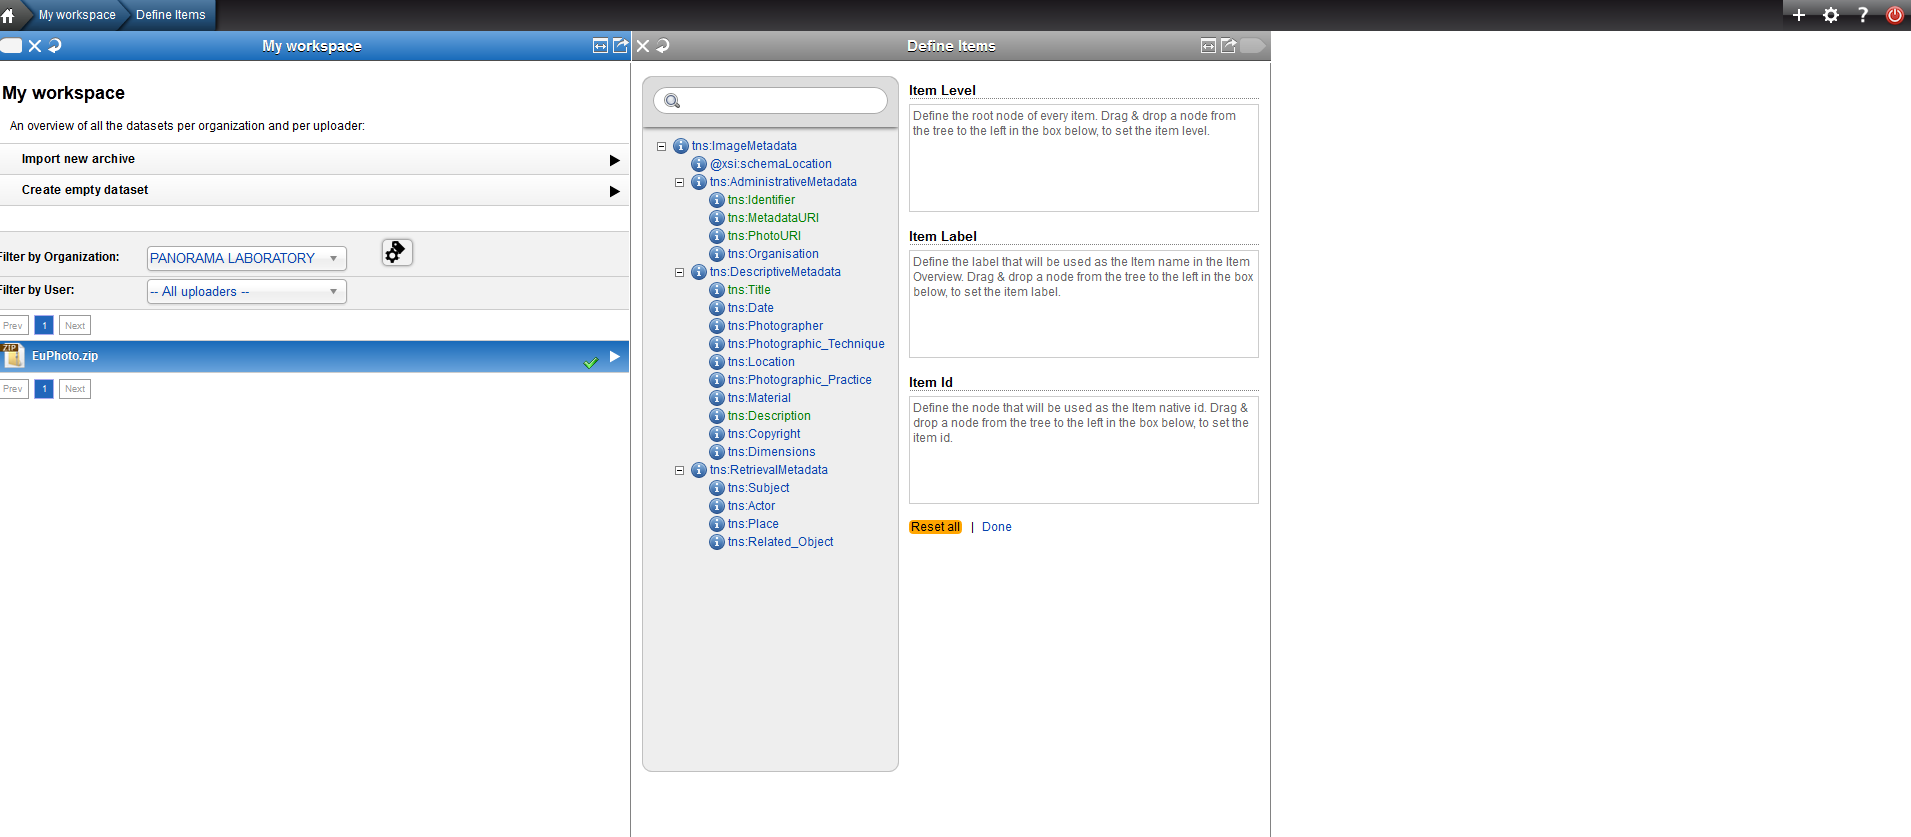
Drag and drop the appropriate elements to the appropriate text boxes (see below)
On the right part of the panel, there is a tree representing the structure of the XML file(s) you have imported. Items with a “+” on the left can be expanded while items with a “-“ can be collapsed.
By clicking on the information icon ( ![]() ) on the left of each node you get information and statistics about the value of the node.
) on the left of each node you get information and statistics about the value of the node.
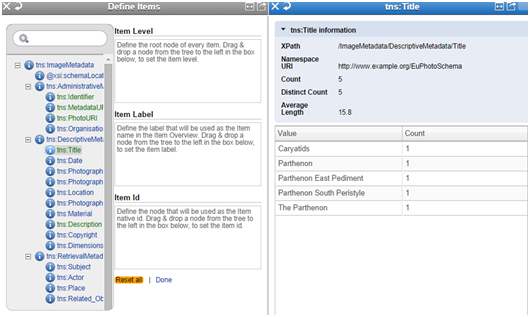
Note that on the top of the tree there is a text field that can be used to search the tree structure of the XML file(s) you have imported. You have to set the following:
- Item Level – Define the root node of every item. Drag & drop a node from the tree to the left in the box below, to set the item level.
- Item Label – Define the label that will be used as the Item name in the Item Overview. Drag & drop a node from the tree to the left in the box below, to set the item label. (Usually, data providers prefer the node “title” to be displayed at the “Show all items”/ “Data Upload items”)
- Item Id – Define the node that will be used as the Item native id. Drag & drop a node from the tree to the left in the box below, to set the item id. After setting the above click on “Done”

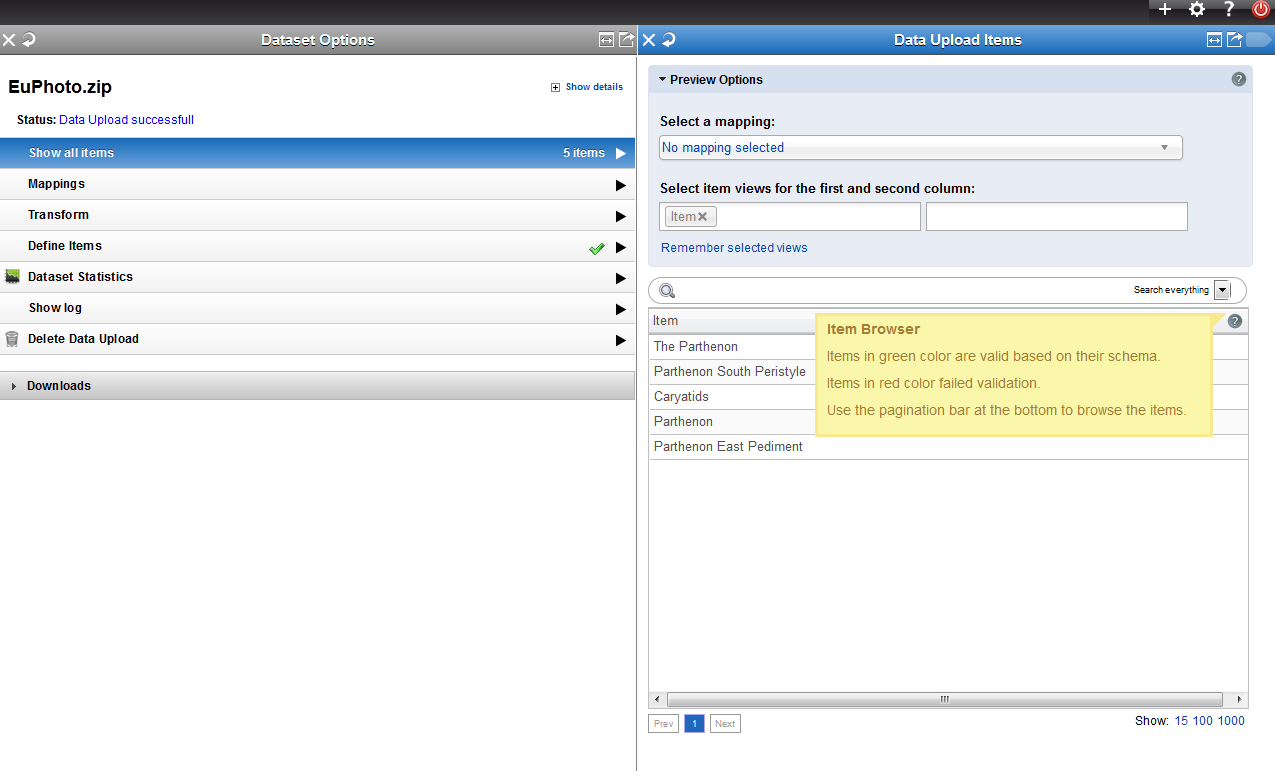
⇒ After having defined the items the following options appear in the “Dataset Options” pane.
VIDEO for Define items
Dataset Statistics
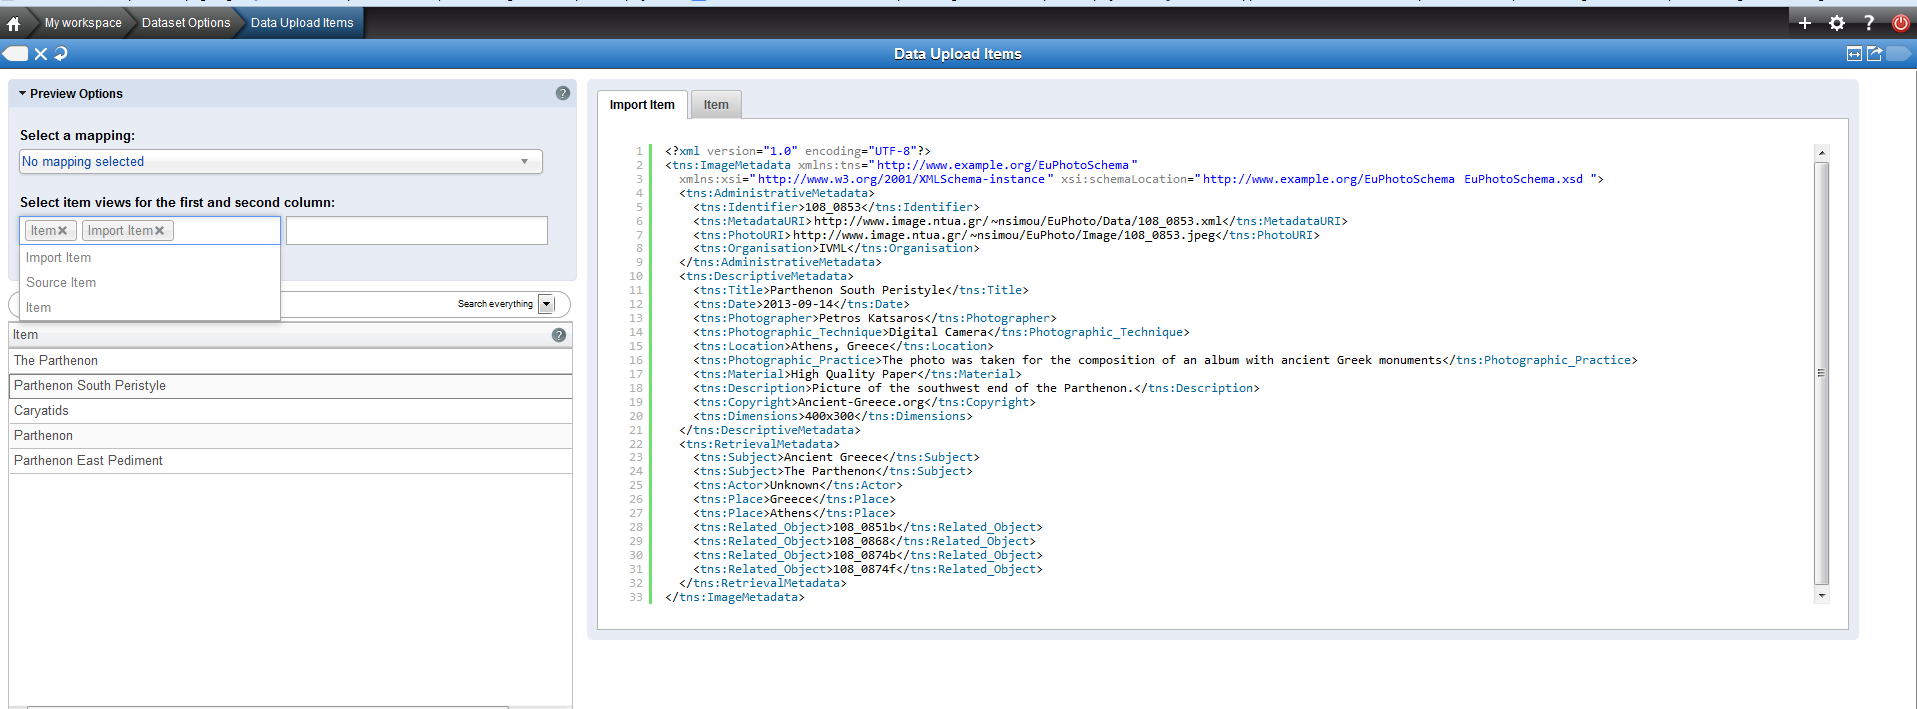
After having defined the items by selecting ‘Show items’, the user can view the items he uploaded.
⇒ By clicking on the question mark? the user can get definitions on:
“Preview Options”
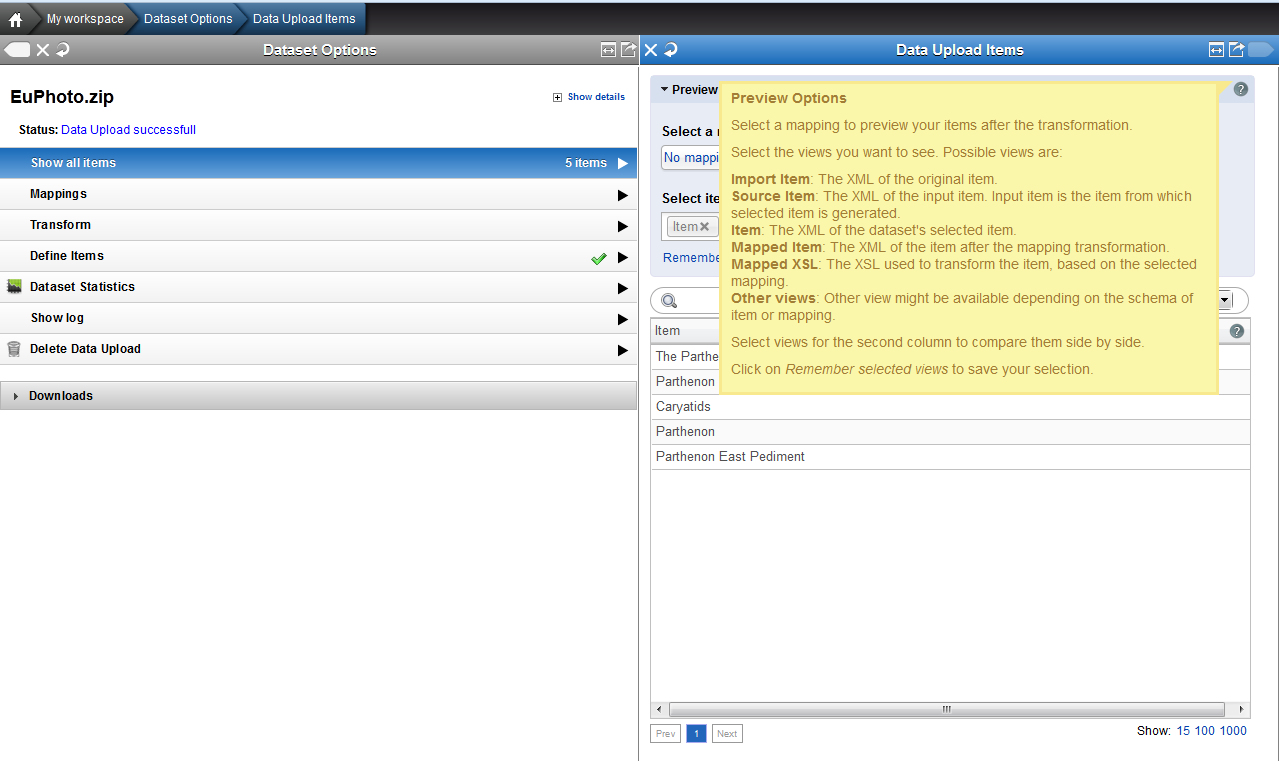
“Item Browser”
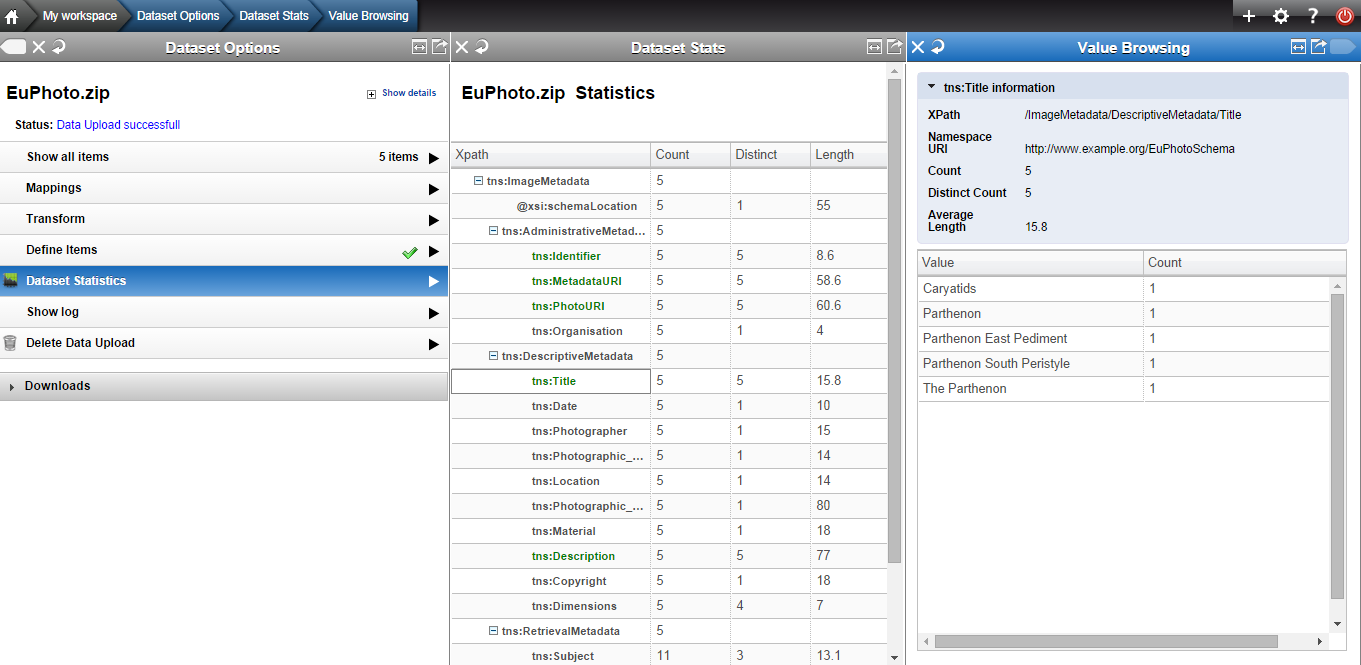
After having defined the Items, by selecting “Data Statistics”, users can see all the metadata elements of the imported dataset.
⇒ By clicking on an element, users can view its values.
Elements with unique values are colored with green color

In detail, you can see all the xpaths of the imported dataset together with their distinct values count and the average length of their values while by clicking on an element you can browse its values.
In the following screenshot, we see the “title element”. In a similar manner, we can view the values of all metadata elements. Moreover, additional information is provided i.e. XPath, Namespace URI, count, Distinct count, Average length. In the example below, count and distinct count have same values which mean that this element has unique values.